Using QNX SDP 8.0 with WSL2 on Windows
There may be some advantages to using QNX within an Ubuntu WSL2 environment on Windows, depending on your use case. Learn how in this post!

Thank you to guest author Marcin Sochacki for this post! Marcin works on the QNX open-source team, and you can often find him making open-source-related changes on GitHub or on Gitlab.
Why Use WSL with QNX?
WSL (Windows Subsystem for Linux) is a Windows feature that allows you to run a Linux environment directly on Windows.
You can install QNX SDP 8 and the Momentics IDE (or use VS Code) directly on Windows. Since QNX supports Windows hosts natively, you might wonder why you'd need a Linux environment for development!
The Linux environment offers several advantages. For instance, porting open-source projects to QNX is significantly easier on Linux. Moreover, many available QNX ports require a Linux host for cross-compiling.
Fortunately, WSL addresses this need without sacrificing the benefits of the Windows ecosystem.
How to Set Up QNX on WSL2
The sections below will walk you through setting up QNX inside an Ubuntu-based WSL2 environment.
Prerequisites
First, make sure you have:
- An Ubuntu-based WSL2 environment installed following the installation instructions
- A QNX account and free license to QNX 8.0
Install QNX Software Center
QNX Software Center is the agent through which you can obtain all other QNX software.
- Log in to the QNX website and download the QNX Software Center for Linux Hosts package
- Start Ubuntu (WSL) and execute the following commands (assuming you downloaded the QNX Software Center to the 'Downloads' directory):
cd $HOME
cp /mnt/c/Users/<username>/Downloads/qnx-setup-<version>-linux.run .
chmod +x qnx-setup-<version>-linux.run
./qnx-setup-<version>-linux.run- You will be prompted to read and accept the DEVELOPMENT LICENSE AGREEMENT.
Finally, if you accepted the default installation directory, the QNX Software Center will be installed at $HOME/qnx/qnxsoftwarecenter.
Install QNX SDP8 and QNX Momentics IDE
There are two ways to achieve the same goal: using the GUI or the command-line version of the QNX Software Center.
Install QNX SDP using the command line
export USER_NAME="your-qnx-user-name"
export PASSWORD="your-qnx-password"
export LICENSE_KEY="your-qnx-license-key"

cd $HOME

./qnx/qnxsoftwarecenter/qnxsoftwarecenter_clt -myqnx.user "$USER_NAME" -myqnx.password "$PASSWORD" -addLicenseKey "$LICENSE_KEY"

# Install SDP
./qnx/qnxsoftwarecenter/qnxsoftwarecenter_clt -myqnx.user "$USER_NAME" -myqnx.password "$PASSWORD" -cleanInstall -mirrorBaseline qnx800 -installBaseline com.qnx.qnx800 -destination ~/qnx800

# Install Momentics IDE
./qnx/qnxsoftwarecenter/qnxsoftwarecenter_clt -myqnx.user "$USER_NAME" -myqnx.password "$PASSWORD" -cleanInstall -installBaseline com.qnx.sdp.host.momentics.group -destination ~/qnx/qnxmomenticside
Install QNX SDP using the Software Center GUI
Check out this video walkthrough of using the QNX Software Center to install what you need.
sudo apt install -y default-jre libswt-gtk-4-javaCheck your installation
You can now check to make sure all of the QNX applications have installed correctly. From your $HOME directory:
- Run QNX Software Center with:
./qnx/qnxsoftwarecenter/qnxsoftwarecenter & - Run QNX Momentics IDE with:
./qnx/qnxmomenticside/qde & - Verify that the SDP installation was successful with:
# Set up QNX environment
source ./qnx800/qnxsdp-env.sh

# Run qcc compiler
qcc
If the output from qcc is cc: no files to process, then your SDP installation is working correctly.
Additional Development Tools
There are some additional tools that you may wish to install in WSL to help with your development.
QEMU
Using QEMU is optional but can be very helpful if you don’t have real hardware available. It can create a virtual machine running the QNX 8.0 OS.
To install QEMU in WSL:
sudo apt update
sudo apt install -y qemu-system-x86 bridge-utils net-tools libvirt-clients libvirt-daemon-system
Virtual machines running QNX can be created using the Momentics IDE, VS Code with QNX Toolkit, or the command line tool mkqnximage.
QNX Toolkit for VS Code
If you prefer using VS Code, you can install the QNX Toolkit extension.
With WSL, the QNX Toolkit extension should be installed only in the WSL terminal. If you already have the QNX Toolkit extension installed locally (on Windows), you should remove it first before proceeding.
- First, if you don't have it already, install VS Code itself natively in your Windows environment (not in WSL).
"When prompted to Select Additional Tasks during installation, be sure to check the Add to PATH option so you can easily open a folder in WSL using the code command."
- Then, install the WSL extension for VS Code using the VS Code GUI.
- Lastly, issue these commands in WSL to install the QNX Toolkit, Microsoft C/C++ (required for C/C++ development), and Trace Viewer for VSCode extensions in the WSL environment:
code --install-extension ms-vscode.cpptools
code --install-extension eclipse-cdt.vscode-trace-extension
code --install-extension qnx.qnx-vscode
After the first launch with the QNX Toolkit extension installed, you will need to configure the SDP path (qnx.sdpPath setting). This should be $HOME/qnx800.
Next Steps...
Now you're ready to develop for QNX in a Linux environment on Windows. As a next step, perhaps:
- Check out the sample applications in Gitlab at gitlab.com/qnx/projects
- Explore some QNX ports or port your own favorite utilities from Linux
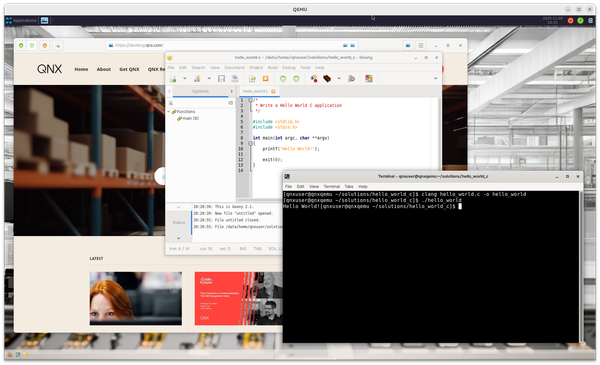
- Develop your first Hello, World app!


